Monday, August 31, 2009


September Stamp of the Month: Treasures

Card kit special:


Special: Delight in Everyday Card kit!! Another card kit is here! Last time, they ran out fast! If you want to guarantee that you will get one, I suggested ordering one on-line ASAP! (On-line orders do not count toward club member orders). If you want to risk waiting until the gathering, that’s fine too! Our gathering is in the middle of the month, so hopefully, we will be fine. (Fingers crossed)
There are two ways to get your hands on this card kit!
#1) buy it out right for $39.95
#2) spend $60 on stamps and get it for FREE!!
(shipping and tax still apply)
Click on flyer for more info:

Spot light Workshop on the go~


New “Workshop’s on the Go!” ~ I am very happy to announce the new improved WOTG! I honestly was not impressed with the WOTG’s announced last year, which is why I really haven’t pushed it and you probably haven’t heard about it. Until now! CTMH has taken the consultants suggestions and made it great! Now you can order the WOTG Scrapbook package of the month and get a $5.00 discount on the package. There is also a Card WOTG for card makers with the same great deal! Each WOTG includes a cute stamp set only available with the workshop, plus a guide to help you make cute pages and cards quicker! By ordering a WOTG, you could have 6 pages done each month. (Come on, you know that’s more than most of you are doing right now.)
Each month I will include the flyer for one theme (both scrapbooking and card making). Just take a look, if you like what you see, then get it! I will have all flyers on my blog; all sets are available during the months of Sept-Dec. It’s so simple, and if you want a complete look, simply add on the suggested embellishments. I really love the WOTG’s and believe that you will
too! So much so, that anyone who orders a WOTG any time between now and the New Year, will get free shipping on the WOTG! (First WOTG order only~ on-line orders do not get discount. Contact me to make a personal order).

Click on the above flyiers for more info~


Tuesday, August 25, 2009

Retiring list for 2009

The following products are retiring this year. That means they are only availabe while supplies last. You can look on my CTMH website to see if they are still available. Just go to shop on-line, and then search for it. if it doesn't come up, that means it's gone.

The first number is the product/order number.

Paper:

X7045A Vintage Travel
X7045B Vintage Travel
X7045C Vintage Travel
X7079A Rough 'N' Tumble
X7079B Rough 'N' Tumble
X7079C Rough 'N' Tumble
X7080A Route 66
X7080B Route 66
X7080C Route 66
X7082A Expedition
X7082B Expedition
X7082C Expedition
X7083A Let's Get Together
X7083B Let's Get Together
X7083C Let's Get Together
X7084A Floral Tapestry
X7084B Floral Tapestry
X7084C Floral Tapestry
X7085A Everlasting
X7085B Everlasting
X7085C Everlasting
X7086A Caprice
X7086B Caprice
X7086C Caprice
X7088A Free Spirit
X7088B Free Spirit
X7088C Free Spirit
X7087A Enchanted
X7087B Enchanted
X7087C Enchanted
X7089A Life Delights
X7089B Life Delights
X7089C Life Delights
X7093A Sweet Pea
X7093B Sweet Pea
X7093C Sweet Pea
X7094A Paper Garden
X7094B Paper Garden
X7094C Paper Garden
X7099A Whoops-A-Daisy
X7099B Whoops-A-Daisy
X7099C Whoops-A-Daisy

Stamp sets:

A1083 WHIMSY NUMBERS
A1090 SUMMER'S WAVE
A1094 MAKE MY DAY
A1097 NO GREATER LOVE
A1100 Boo-tiful
B1210 FLUTTER
B1213 LITTLE ANGEL
B1256 ALFRESCO
B1265 WONDERFUL CHARMS
B1270 BELOVED BLOSSOMS
B1271 SUMMER PICNIC
B1274 CELEBRATION BLOCKS
B1276 DINO ROAR
B1279 LIFE IS A PARTY
B1280 BEST OF TIMES
B1281 HALLOW SCREAM
B1282 SENSATIONAL SEALS
B1283 LITTLE SPOOKS
B1299 SPRING EQUINOX
B1300 LUCKY YOU
B1301 SOFTBALL
B1303 GOLDEN YEARS
B1304 GYMNASTICS
B1310 Volleyball
B1312 Make A Wish
B1317 Shalom
C1190 Believe Lowercase
C1191 CALENDAR
C1205 WHIMSY CAPS
C1206 WHIMSY LOWERCASE
C1247 SIMPLE BLOSSOMS
C1256 LITTLE BOYS
C1259 BECAUSE I LOVE YOU
C1263 CHARM UPPERCASE
C1265 CHARM LOWERCASE & NUMBERS
C1267 EASTER EXCITEMENT
C1268 VALENTINE EXCHANGE
C1269 FABRIC FINISHES
C1270 PURE LOVE
C1271 TREASURES OF THE HEART
C1273 AHOY MATEY
C1274 NATURE WALK
C1275 SAFARI
C1276 ADVENTURE
C1279 ROUGHIN' IT
C1280 OUT WEST
C1281 CARD COMMENTARY
C1283 DANCING DREAMS
C1284 WILD THING
C1285 VICTORIAN SNOW FLAKE
C1286 GOODNESS OF LIFE
C1287 CELEBRATE LIFE
C1289 WARM MEMORIES
C1290 MEMORY LABELS
C1294 SWEET TREATS
C1295 WINTER PLAY
C1296 COLOR MY WORLD
C1298 PARTY INVITATION
C1301 THING OF BEAUTY
C1302 BOUTIQUE NUMBERS
C1303 PLACEMENT GUIDE
C1306 Genuine Country
C1309 Decorative Dainties
C1312 United We Stand
C1314 Tool Time
C1319 Laughter
C1320 Just Arrived
C1321 Solos Punctuation
C1325 Wonderful Holiday
C1327 Snowflake Kisses
C1329 Homeward Bound
C1330 Winter Fun
C1331 Santa's Flight
C1332 Merry Wishes
C1334 The Season Defined
C1335 Ring in the New Year
D1063 SWEET TALK
D1082 MADE BY ME
D1083 Believe Caps
D1085 HAPPY EASTER
D1110 GIVE THANKS
D1131 RITZY RIBBON
D1139 SMALL PLEASURES
D1141 SO SWEET SEASONS
D1151 OFF ROAD
D1154 LOVE IN BLOOM
D1160 FRIENDSHIP FLOWERS
D1164 THE GOOD LIFE
D1167 Halloween Parade
D1168 SCHOOL ZONE
D1169 BIRTHDAY SURPRISE
D1178 CHRISTMAS GREETINGS
D1181 AUTUMN SPLENDOR
D1182 IT'S A PARTY
D1183 ADORABLE
D1184 FLYIN' HIGH
D1186 RUSTIC FLOWERS
D1189 FLORAL DELIGHTS
D1192 NOW AND FOREVER
D1193 VINTAGE VALENTINES
D1199 COME UNTO ME
D1205 NEW HORIZONS
D1209 LOVE FLOURISHES
D1210 MOMENTS
D1213 HUNTING
D1215 GAME NIGHT
D1216 FINISH LINE
D1218 SUMMERTIME
D1220 TYPEWRITER KEYS
D1223 FAIR BLOSSOMS
D1228 CHILLIN'
D1229 FABULOUS FALL
D1230 CELEBRATION FEAST
D1231 LOVELY BUCKLES
D1232 NATURE'S VEIN
D1233 POWER PLAY
D1234 TAKE FLIGHT
D1235 TICKET FOR ALL SEASONS
D1236 NURSERY BASH
D1238 A BIRTHDAY WISH
D1240 DOODLE ART
D1241 WINTER WONDER
D1246 SWEET LOVE
D1253 FRIENDSHIP'S FLIGHT
D1256 ALL STAR
D1264 ANGEL WHISPERS
D1268 JANUARY WORD PUZZLE
D1269 FEBRUARY WORD PUZZLE
D1270 MARCH WORD PUZZLE
D1271 APRIL WORD PUZZLE
D1272 SLUMBER PARTY
D1273 TEE TIME
D1274 BELIEVE IN ME
D1277 Touchdown
D1278 Best Shot
D1279 Shootin' Hoops
D1282 He Said, She Said
D1287 May Word Puzzle
D1288 June Word Puzzle
D1289 July Word Puzzle
D1290 August Word Puzzle
D1291 Celebrate Canada
D1295 Vintage Canada
D1310 September Word Puzzle
D1311 October Word Puzzle
D1312 November Word Puzzle
D1313 December Word Puzzle
D1314 Friendship Patch
D1318 Uniquely You
D1321 Festivities
D1323 Happy Christmas
D1325 Argyle Backgrounds
D1328 Post Marked
E1001 Essential Alphabet
E1003 BOUTIQUE ALPHABET
E1004 COBBLESTONE ALPHABET
E1007 HOMESTEAD ALPHABET

A few of my favorite things that will be retiring:
z817 Just Blooms Autumn Daisy
z818 Just Blooms Sunflower
Z1304 Just Blooms Autumn Leaves
Z1051 Bitty Brads
Z1037 Mini-Medley Shades of Chocolate

Here are the no longer availabel items as of august 25th
1394 Vellum Paper 12 x 12
1505 Memorabilia Pockets
X7080B Route 66 Level 2 Paper Packet
Z1043 Dimensional Elements Bookplates
Z1109 Cranberry Brads
Z368 Coluzzle Cutting Mat
Z370 Coluzzle replacement blades
Z374 Coluzzle Oval
Z825 Clear Inspirations Friendship Dangles

Saturday, August 1, 2009

Embellishments: Ribbon 101


Embellishments: Ribbon
(All prices and page numbers refer to the summer 2009 Idea Book)

http://create.myctmh.com/MyCTMH/ProductHighlights.aspx?PageId=180

CTMH Ribbon: (page 91)

Organdy: Sheer ribbon.
• You can use any ink color to change the color of white daisy organdy ribbon. Using sponge daubers (page 100 $3.95), lay daisy white organdy ribbon over the ink pad and push the ribbon into the ink pad. Move ribbon across ink pad and continue pushing with sponge. Let dry before handling.


Grosgrain: woven regular ribbon.
• You can stamp any design/words/letters onto the grosgrain ribbon. I recommend using white daisy for true color. Let dry before handling. (sample on page 59 “grin and bear it”)


1) Bulk Ribbon: $6.95
• The ribbon comes in basic colors; daisy white, colonial white, cocoa, black, and cranberry. Each roll has 20 to 25 yards.
• Great for saving money.
• Start with bulk ribbon if you are overwhelmed by all the color options. I recommend Cocoa grosgrain and daisy white grosgrain and/or organdy.


2) Designer ribbon rounds
• Excluding the black collection and ricrac, the ribbon rounds come with 4 different styles, 6 feet of each, for a total of 24 feet of ribbon. $7.95
• Look at the paper you like, is there a common color? Is there a color you tend to like?
• Black collection and ric rac come with 5 designs, 4 feet of each design for a total of 20 feet.


3) Sassy strands: $3.95
• Each set comes with 6 different colors, 16 feet total (so a little over 2 feet each)
• The sets are divided by the same colors from the color wheel on page 10 & 11
• Read carefully to make sure you are getting the texture you want: lacy chain, loop, or chenille (see picture on page 91)

Store your ribbon with the Ribbon Rounds Organizer on page 104. $22.95

***********************************************************************************

Ribbon is my 2nd favorite embellishment. It adds a lot by doing just a little.
Remember to #1 Rule for embellishments – BREAK IT DOWN! The next time you look through the idea book (or any other magazine) ask yourself “What did they do with the ribbon?” Ignore all the other embellishments on the page and just look at the ribbon. If they involved another embellishment (like a brad, staples, ect) then look at how they work together.

Gluing Ribbon Down:
1) Glue dots. Press the ribbon against the glue dot, and then pull the glue dot off the packaged paper. Stick onto page as desired. Great for bows, knots and smaller pieces.
2) Tombo (aka double sided tape dispenser). Run tombo along ribbon. Place ribbon on page as desired. Great for long pieces that you want to stay straight.

Basic simple ways to embellish with ribbon/Sassy strands.
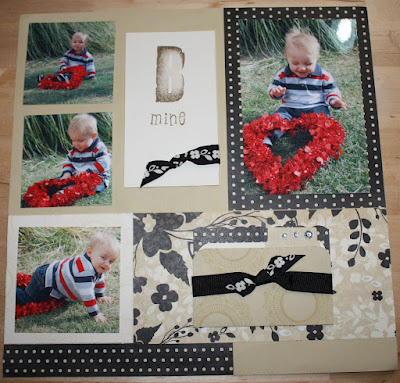
a) Across the page with a bow/knot. This is the #1 easiest ways to use ribbon. Scrapbook samples: 19, 31, 35, 61, 83, 88. Card samples: 23, 31, 35, 57, 64, 65, 72, 81. Ric rac samples: 62, 73, 74.
• You could also tie several knots along the ribbon, then place the ribbon down.


From ribbon


From ribbon


b) ¾ across the page ending with a knot. This is a variation of (a). Simply tuck one end around the edge of the paper, then cut the ribbon ¾ away across and tie the end in a knot. pg 19, 75.


From ribbon

From ribbon


c) Just bows or knots. Tip: If you can’t seem to tie a nice bow – then don’t. Simply tie a knot instead – it looks just as cute as a bow! Tie just a bow/knot and place it on your page/card. Place it along corners, along thin strips of paper, on stickers or stamped images, or on part of an alphabet. Pg 47, 57, 62, 65.


From ribbon


From ribbon


From ribbon


d) Little tabs: Simply fold a small amount of ribbon in half like a “v” and attach to page. Glue behind photo, frame, image, ect. See ribbon with embellishments for more tab ideas. Attach at the point for a “v” shape or at the ends for a different look – pg 70 “you did it card”.


From ribbon


From ribbon


From ribbon


e) Along the bottom and/or top of a title or section. Page 27.


From ribbon


From ribbon


From ribbon


f) Hold the sides of a quote/title/greeting/image/journaling. Pg 34, 59, 81


g) Use to bind card or mini photo album ect. Punch holes in side of card and tie ribbon through. Pg 35.


h) Place a thinner strip of paper over the ribbon. Pg 47. Place a different color of sassy strand along the ribbon for a layered look. Pg 61 top left


i) Hide half of the ribbon under the edge of paper for a layered look.
• I especially like doing this with the wider ric rac for a wavy look.


Ribbon with other embellishments:


a) Brads
• Brads on ribbon. After you have attached your ribbon to your project, use a piercing tool to poke a hole through the ribbon and paper. Place brad through hole and set. Pg 68 top right.
• Decorate with an odd number of brads.
• Lay the ribbon across page/card. Then pinch the ribbon in-between the legs of the brads – then attach brads.


From ribbon


From ribbon


From ribbon


From ribbon


b) Photo hangers (page 95. $14.95 for 48 hangers in 6 different colors.)
• Place photo hanger along side of quote/photo/journaling/, lace ribbon through hanger part and lay along rest of page. Pg 66 bottom right.
• Place two photo hangers – one on each end of quote, title, ect – and lace ribbon through. Pg 81 bottom left.
• Tie a knot on the photo hanger. Pg 67, 80
• Create a “v” shape by lacing it through the hanger then to top (or side). Page 77
• Use the photo hanger to hang a stamped image from the center of a knot/bow. Pg 81 bottom right.
• Make a “buckle”. String ribbon through hanger then have shorter end held down by a brad.


From ribbon


From ribbon


From ribbon


From ribbon


From ribbon


c) Edge anchors (found on page 94 $5.95 per set).
• Place the edge anchor along the edge of the paper. Tuck the edge of the ribbon into the edge anchor. Using your piercing tool, pierce into the whole, through the ribbon and paper. Place brad into hole and set brad. Pg 48 I miss you card.


From ribbon


From ribbon


From ribbon


From ribbon


d) Eyelets ( found on page 94 $3.95 per set of 100)
• After you have attached the ribbon to your project, use a crop-a-dile, to set the eyelets through the ribbon. A few options include eyelets along a strip of ribbon, or eyelets holding the “legs” of a ribbon or knots.
• First mark and set your eyelets onto your page. String ribbon from one eyelet to another.
• Set the eyelets up the way you would lace a shoe and then lace the ribbon through.
• Do eyelets equally along the page/card side and then lace through – over paper, then under, then over (like hand stitches).


From ribbon


From ribbon


From ribbon


From ribbon


From ribbon


e) Mini medley accents collections (found on page 95 $7.95 each set).
• Lace through buckles, pg 46.
• Lace the ribbon through the swirl things. Tie a knot on the swirl thing ( winter cozy collection)
• See safety pins part(h)


From ribbon


From ribbon


f) Tags
• Place a photo hanger at the top of a tag and tie a bow/knot.
• Fold ribbon in half and staple in place.
• Fold ribbon in half and use a brad or eyelet to hold in place.
• Use a large brad and put ribbon through the eyelet.


g) Foundry frames and book plates (found on page 94 $3.50 to $4.95)
• String ribbon through the holes on the bookplates (instead of using the brads). Tie in place with a bow or know.
• Wrap around the edge of the frames and tie in place with a knot or bow.


h) Safety pins and Pretty Pins (found on page 92. Set of 12 for $4.25)
• Pin through the ribbon. Pin through the knot on a bow (or the knot) pg 35. Pin a stamped image (like a heart) through the pin and ribbon, pg 27 on photo cube.


i) Dimensional elements (page 96 price ranges). Decorate your d-elements with bows and knots. Wrap sassy strand or ribbon around a d-element. Some d-elements come with ribbon slides, see page 22 for a decorated example.


j) Buttons
• Glue a button to the center of bow/knot. Tie a small bow and glue to center of button. Pg 57
• Glue buttons along ribbon.
Ribbon’s with stamps/stickers:
a) Lay the ribbon across the page/card, and have stamped image/d-element overlap ribbon. Page 37, 47, 55, 64, 67.
b) Decorate your stamped characters with ribbon. Tie bows/knots around necks, on hats, holding a group of flowers – the possibilities are endless! Pg 71 bottom right.
c) Decorate letters. Page 62, 88
d) Stamp designs/words onto the grosgrain ribbon. See “Grosgrain” at the beginning.


From ribbon


From ribbon


From ribbon


From ribbon


From ribbon


From ribbon

Wednesday, June 10, 2009

Embellishments
(All page numbers and pricing refer to the Summer 2009 Idea Book)
************************************************************************************
RULE #1 BREAK IT DOWN:

When you are looking at examples from the Idea book or other work, the first thing we all do is think "wow, that is alot of embellishments, i don't have time for that." Instead, break it down by looking at the sample and asking yourself "What did they do with _____"

In todays lesson, when you see my samples, i want you to look at them and ask yourself - "what did she do with the brads?"

When you do your own work, start with the brads. Ask yourself "What can I do with brads?". Then if you still draw a blank refer to the following list.
************************************************************************************
I first want to bring up what I believe to be the easiest embellishment.
Easiest: Matching stickease
*Each pack of CTMH paper has matching stickease available for purchase. Stick them anywhere on your coordinating pages or cards for a quick and easy embellishment.
* Add 3-D foam tape (pg99) to make your stickease “pop” out, or to layer your stickease.
* Add any embellishment to your stickease. I.E. use brads on the tag stickease.
*********************************************************************************
2nd Easiest: Brads

CTMH brads (p94-95):
· Bitty brads (3mm): assorted basic colors, $5.95
· Brads (4mm): several assortments, $4.95
· Bigger Brads (8mm): several assortments, $12.95
· Pewter Designer Brads, $3.95
· Mini medley accents: different collections come with different types of brads, including the corduroy brads, square brads, and flower brads.

Tip: Over whelmed by all the options? Start out with only the metallic brads; antique copper, gold, pewter, and/or silver. The metallic brads will match everything!
************************************************************************************
How to put a brad on your art work:
1) Poke a hole through your paper with the piercing tool.
2) Push the “legs” of the brad through the hole.
3) On the other side bend open the “legs”.

How to lay down your brads evenly:
· Use a ruler ~ I recommend the clear quilters ruler. Line up the ruler as desired and mark with a pencil.
· Stiff mesh grid (found in craft stores in the yarn section) ~ lay across paper and use the “squares” to mark with a pencil where you want to put your brads. I.e. – mark every third square.
· Placement guide stamp set (c1303) and similar stamp sets. Stamp with a light ink color, such as bamboo, then poke the holes where the dots are.
Tip: if you want to do every other circle, use a marker to mark the dots you want to use as guides, then stamp it onto paper.
***********************************************************************************
Part A) Brads
1) Corners –
a) Place a brad in each corner of a frame/photo/journaling/decorative paper ect…This is an easy way to add brads to your page and it always looks good!
Tip: I LOVE to use the bitty brads for tiny corners (especially on cards).
(pg 58,67.69,87)

Layout samples:

Bitty brads


Regular size brads:


card samples:
i love to use bitty brads on cards

Bigger brads;

regular brads:

Bitty brads


b) Fold the corner of the frame/ or other decorative paper and hold down with a brad.

card sample:


2) Along the side/bottom/top
~ Place the brads in a row along the side or next to the side of the page/photo/quotes/journaling/individual letters/titles/… Use any amount.
Pg 22, 23, 30, 33, 41

card samples:

3) Several brads in a row on top of a strip of cardstock/sticker/ribbon. Pg 17, 45, 69. Or on a letter. pg 68

card sample:


4) Along scallop, either on the bump or in between – page 23, 29, 64, 81,
(see Idea book pages listed for samples)
5) Hold individual words (dates, names, broken up quotes). Cover page, pg 61


6) In corners or along the corners in groups of 3 ( pg 46). You can do this in the corner of the photo’s as well.

7) Circles ~ using the Placement guide stamp set or similar stamps. Pg 31,44, Circle around circles, pg78. Change the size of the brads around the circle (page 49 – clear sparkles around butterfly.)


8) Sprinkled or random along page/card. Pg 30. (see idea book page listed for sample)
9) Use brads to dot the i’s and j’s in title/names/or journaling.
************************************************************************************
Part B) Brads with other embellishments

1) Ribbon –
a) Holding down the ribbon on each end or along the ribbon to decorate it.
Pg 59

b) Use brads to hold down the “legs” of a bow or knot.


2) Sassy strands –

a. If you have four brads on the corners, wrap the strand around the brad and string it along to the next brad and wrap again. Continue until the sassy strand frames the square.

b. Hanging on wall look – use the brads like the “nail” and the sassy strands hang from the nail to the corner of the frame.

c. Wrap sassy strands along brads that are holding down the sides of a title/quote/ect…(pg 60)


3) Stickease – decorate the stickease with the brads (pg 17). Put a brad in the center of the stickease (cover). Scattered in between stickease (pg 29).
4) Paper flowers/felt cuts – put a brad in the center of a flower (pg 64, 71). Large flower use a bigger brad, tiny flower, use bitty brads. Use brads to hold down the petals.

5) Sparkles and rub-ons. Place a sparkle on the brad. Decorate bigger brads with rub-ons (pg 83)
***********************************************************************************
Part C) Brads with stamping
1) Place brads in the center of flowers (pg 72, 84), center of stars (65), and other shapes.
2) Dots – If a stamp has dots as part of the design, use the dots as guides for a few brads.
3) Put a few brads next to an image to highlight it. Pg 64 rolling pin.
4) Stamped scallop images (81)
5) Decorate characters or images ( 70 cake, 57 tree w/blue brads)


Tip: Use these same ideas with sparkles!